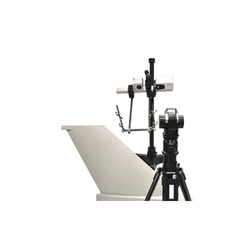

Innovation Through Collaboration The Smart ScanTM Solution combines cutting-edge technologies from Automated Precision Inc. (API) and Steinbichler Vision Systems to create high resolution 3D point clouds without the need for multiple setups or triangulation targets. Using the Smart Scan reduces the time needed to perform 3D surface quaty control checks or large surface-area scanning from days to hours. More Than Just Fast - Its Highly AccurateThe unique hardware setup of the Smart ScanTM provides increased measurement accuracy. Unke current scanning and image stitching products which lead to overlap, bending, and other photogrammetric errors, scanned patches are stitched together based on precise coordinate measurements of the part and the scanner. This leads to increased accuracy and ghtning-fast image stitching. So How Does It Work?First, the Smart ScanTM utizes the long-range accuracy of API's Tracker3TM and SmartTRACKTM Sensor to measure the exact 6-DOF position and orientation of the Steinbichler COMET 5© 3D Scanner. Next, Steinbichler White ght Scanner technology obtains high-accuracy 3D point cloud images. Finally, Smart Scan software uses the coordinate measurements to seamlessly stitch the 3D point cloud images together resulting in one large 3D point cloud. Easy to AutomateBy using simple positioning systems for the scanner, such as robot arms or gantries, the Smart ScanTM decreases measurement time from days to hours. Measurement tasks that were not possible before are easily achieved using the Smart Scan.
Manufacturer and supplier of flexible manufacturing system, volumetric error compensation, automatic error compensation and automated volumetric error compensation.
More details:View company website
Its Free
Verify Now