Dynascan Inspection Systems Company
Product Range
Fact Sheet
- Location:Karnataka, India
- Year of Establishment:1982
- Business Type:Manufacturer, Distributor / Wholesaler, Exporter
- Main Products:Profile Projectors, Video Profile Projector
- Reviews & Rating:
Get Verified, Sell more with
- Buyer's trust
- Faster conversions
- Better Rankings
- More
Its Free
Verify NowVision Inspection System
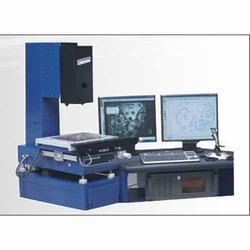
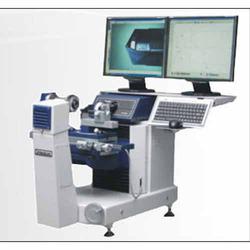
We are offering our clients with a range of Vision Inspection System with quality construction that is coupled with precision engineering with unique camera based inspection station for visual inspection, measurement and generation of CAD drawings.
- FOB PriceNA
- Min Order QuantityNA
- Payment TermsNA
Other Details
Vision Inspection System
Technical Specifications
| Light Path | Vertical |
| Imaging System | High resolution CCD camera couples to a 7:1 zoom lens |
| Magnification | 20x to i40x, in 5 steps, magnifications can be decreased to 10x or increased upto 280x by use of auxiliary lenses |
| Work Stage Table Top Area | 380 x 280 mm, with two t slots |
| Measuring Range X, Y Axis | 250 x 175 mm, with quick release in both x, y axes |
| Resolution / Measuring System | 0. 001 mm, built in glass scales |
| Profile Light | 9 segment led light source |
| Surface Light | 64 segment programmable, rotating ring light enables correct lighting conditions for all applications |
| Auxiliary Lighting | An optional auxiliary light is provided through a flexible tube or through the lens for difficult lighting conditions. |
| Display | Two 19 inch lcd flat screen monitors, one for the image, the other for tracing of parts to cad and display of measured results/reports |
| Geometric Measurement Software | Powerful microprocessors based controller with advanced geometric measurement software dgms-3, covering all measuring applications |
| Inspection Tools | Scanning of irregular features, mouse point, edge tools like circle, arc point, length, tangential, peak poine, thread profile and cross hair for use like a profile projector, cross hair rotates for angle measurement on screen |
| Programming Function | All measurements get stored automatically as a program and can be recalled later for repeat measurement |
| Geometric Tolerancing | Geometric tolerancing of length, diameter, angle, concentricity, parallelly can be user defined to provide pass/fail reports |
| Drawings, Import / Export | Drawings of the part can be generated and transferred to cad as a dxe file for comparison with the master design drawings with dimensions can be generated form error of parts can also be measured. |
| Reports | Pass / fail reports with tolerances can be created, stored or exported to a spreadsheet |
| Spc Data | The dgms 3 software allow for the collection of data for spc and is displayed in the form of bar charts and graphs 1, 2,3 & 4 sigma tolerance bands in colour provide data for process control and cpk values are also displayed |
| Power Supply | 230v, 50hz, ac, single phase |
| Weight | 130 kg (approx) |
Images


